
How to Create a Family History Book: The Ultimate Step-by-Step Guide to Preserving Your Legacy
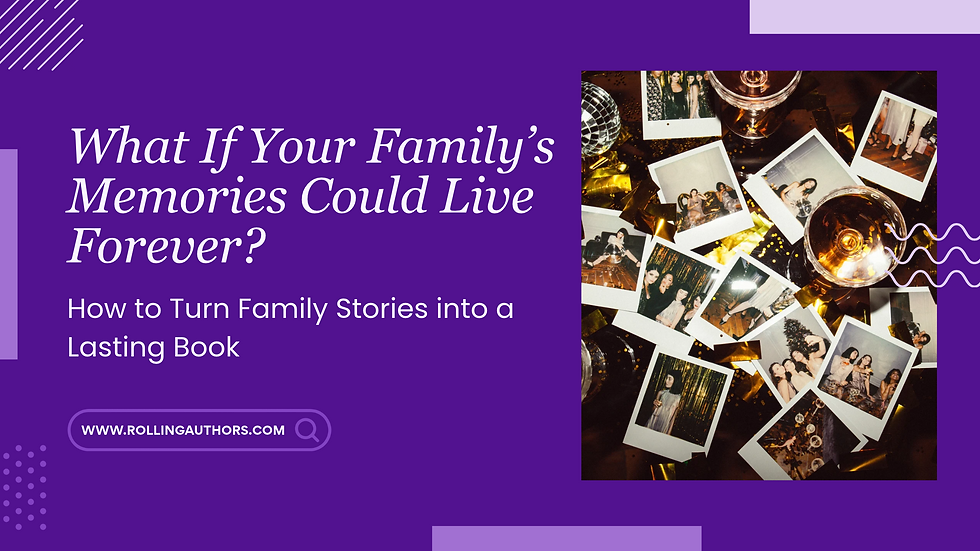
There is something deeply spellbinding about holding and looking at an old, faded photograph in your hands. You see the face of your ancestor, perhaps your great-grandmother standing stiffly outside a farmhouse or your grandparents being happy on their wedding day. You smile at them—these are the people who made your existence possible. But time wears away at memories. The names on the back of the photos blur, and the stories these people lived become legends, eventually lost to history.
Creating your dream family history book can be an intimidating process. Family history books are a labor of love—a way of preserving the memories of your ancestors and passing them on to the next generation.
However, turning a shoebox of disparate documents and photos into a polished, heirloom-quality book is an enormous task. It requires patience, research, and hundreds of hours of work.
Looking to create a stunningly designed, professionally printed family history book but don’t have the time, writing skills, or design talent to do it yourself?
Rolling Authors is Asia’s premier book development studio. With 400+ books written and 750+ books edited, we specialize in transforming raw, unpolished family materials into breathtaking, publication-ready family history books.
Table of Contents
Step 1: Identifying the Scope and Purpose of the Book
Before you dive into digitizing photos or recording interviews of your family members, it is critical to identify the scope and purpose of your family history book. Family history books are an all-over-the-map pursuit, and attempting to do everything at once will leave you exhausted and dissatisfied.
1. Choose your narrative focus.
Are you writing a sweeping genealogical history that traces your bloodline back five generations? Or are you zeroing in on a particular theme, such as the immigration story of your grandparents or a collection of beloved family recipes? Do you want to write a narrative-driven memoir or design a coffee-table book filled with your favorite photos and mementos?
The Genealogical Archive: Focuses on names, dates, and places – best for preserving raw historical data.
The Narrative Memoir: Focuses on the lives and personalities of particular ancestors—best for telling a human-interest story.
The Visual Heirloom: A photo-heavy, coffee-table book with minimal text—best as a gift-giving keepsake.
2. Decide on your target audience.
Is your intended audience your children and grandchildren, who will receive signed, limited-edition copies of the book at a family reunion? Or is it the world at large, as you seek to publish the book and share your fascinating family saga with readers everywhere? Your target readers will shape much of the book’s content and design.
3. Set a realistic deadline and budget.
A quality family history book is rarely a weekend project—you may want to plan for a window of anywhere between 3 and 12 months. You may also want to set aside funds for hiring specialized assistance and also the cost of scanning and printing.
Step 2: Assembling the Materials for the Family History Book
The next step in the book creation process involves assembling the materials for the book—becoming a searcher and amassing all the primary sources you can find.
1. The Search for Primary Sources
Begin by contacting older relatives and asking them to help you dig through attics and basements. Here’s what you’re looking for:
Photographs: Prints, negatives, and slides.
Documents: Birth certificates, marriage licenses, immigration papers, military discharge papers, and deeds to property.
Ephemera: Letters, postcards, diaries, and home magazines.
Heirlooms: Recipes, ticket stubs, and newspaper clippings.
2. The Archiving and Scanning Process
It takes more than relying solely on physical primary sources—invest in a high-quality flatbed scanner or use a professional scanning service. Scan all your photographs at 600 DPI (dots per inch) or higher so that the images will come out nicely for professional printing.
3. Folder Organization and File Naming
Carefully organize your digital files and arrange your photographs according to their contents. Set up a folder system on your computer so that you can keep and easily access the files. Store documents in chronological order or by family branch. Also, rename all your digital photograph files so that they are descriptive and uniform.
Step 3: Conducting In-Depth Interviews with Senior Family Members
Documents and photographs are essential, but a family history book should also include the voices of your ancestors. Pay attention to the mannerisms and idiosyncrasies of your elders—these will bring your book’s characters to life.
1. Preparing Questions and Prompts
Please refrain from asking generic questions. Instead, prepare a list of evocative prompts that will stimulate the interviewee’s memory, such as:
“What is the first thing you remember about the house where you grew up?”
“How did your family celebrate holidays when you were ten years old?”
“What was the happiest day of your life and why?”
“What is a family tradition you hope we always remember?”
2. Recording the Interview with Quality Equipment
Invest in a digital voice recorder or a quality smartphone app. Set up the recording in a quiet room with no background noise. If the interviewee is comfortable with it, use a video camera to record the interview—capturing nonverbal cues will help you understand the interviewee better.
3. Listening to the Recordings and Extracting the Highlights
Now that you’re done with the interviews, you will need to listen to the recordings and extract the highlights. This is also a good time to transcribe the interviews and label the chapters.
Step 4: Organizing the Book Into a Coherent Structure
So you have gathered all the precious materials for your family history book, it is time to organize them into a coherent structure.
1. Chronological or Thematic Organization?
Book content can be organized in a number of ways, but the two most common methods are chronological (in date order) and thematic (organized around topics).
A chronological organization might look like this:
Chapter 1: The Ancestors (1800s–1920s)
Chapter 2: The Immigration Journey (1920s–1940s)
Chapter 3: The War Years and Post-War Boom (1940s–1960s)
Chapter 4: The Modern Family (1970s–Present)
A thematic organization might be centered around a pivotal theme, for instance, cuisine:
Chapter 1: The Old Country Recipes
Chapter 2: The First Restaurant
Chapter 3: Sunday Dinners
Chapter 4: Passing the Torch
2. Creating the Table of Contents
The final step in the organizing process for your book is to create the table of contents. This will form the spine of the entire book, providing readers with a roadmap to your family’s fascinating history. Under each chapter listing, add subheadings naming the specific documents and stories that will be included in each section.
Step 5: Writing and Compiling Book Content (The Heavy Lifting)
This is the step where most independent book projects unravel. Now that you have gathered and organized all your materials, it is time to give them a compelling, readable narrative. You will need to carefully edit and compile your notes, interviews, and documents into a coherent manuscript.
1. Finding the Right Voice for the Book
Have you thought about giving your book a particular voice or tone? Perhaps it should be breezy and entertaining. Maybe it should be more serious and academic. Whichever approach you choose, remember to maintain a consistent voice throughout the manuscript.
2. Interweaving Documents and Oral Histories
A great family history book weaves together primary historical documents, such as letters and contracts, with compelling stories, anecdotes, and genealogical research. Integrate your documents and interview transcripts into your draft manuscript.
3. Fact-Checking and Historical Research
It’s important to verify all the facts in your book. Historical research adds authenticity and can fill page after page of a family history book. Double-check the dates and locations by consulting public historical documents like census records and passenger manifests.
Step 6: Design, Formatting, and Photo Restoration
Just as a good message needs a good messenger, so too does a family history book need a compelling design.
Designing a family history book is almost like decorating a cake—you want to make it beautiful, but you also want to ensure that all the words on the page are readable and the photos are easy to view.
There are many online tools you can use to format text, choose an elegant font, and restore old photographs.
1. Photo Restoration
Beloved old photographs that have been stored away in a box tend to be in less-than-perfect condition. You might find them to be discolored, scratched, torn, or water-damaged. Professional photo restoration is a must; using the right software, experts can carefully retouch scratches and fading. In addition, if you have black-and-white photos, the option to colorize them can breathe new life into the familiar faces of your ancestors.
2. Layout and Typography
It is tempting to place your photos randomly on blank pages, but that would be a disservice to the story they tell. Instead, use principles of layout and design to create a collage page, or leave generous white space around each photograph. Pair elegant, easy-to-read fonts for the body with stylized, decorative fonts for chapter titles. Make sure to integrate pull quotes from your interviews to add intrigue and contrast.
3. Custom Elements
Create custom elements that celebrate your family’s unique history. For example, many families cherish the idea of a family crest, so you can have one custom-designed and mounted on the cover. Similarly, you might want to include a family tree in the front matter or on the endpapers that shows your ancestors’ names in an illustrated pedigree format.
Step 7: Choosing the Right Printing and Binding for an Heirloom
Finally, decide on a printing and binding method that will preserve your book for decades to come. Family history books are meant to be passed down as heirlooms, so they require special attention and care in production. They cannot be printed on low-cost, acidic paper that will yellow and decay in a matter of years.
1. Archival-Quality Paper
Make sure that the printing company uses archival-quality, acid-free paper to ensure that the ink will not fade or bleed.
2. Premium Binding
The binding should be strong enough to hold the book together, even when the book is opened to its fullest extent, which is important for photo books that contain large photographs. Many bookbinding methods exist, but Smyth-sewn hardcover binding is considered to be among the strongest and longest-lasting.
3. Printing Strategy
Your printing strategy depends on how many copies you intend to print and for whom. If you only need between 10 and 50 copies for your relatives, then digital printing (such as the HP Indigo method) is the most financially viable option. If you plan to print several hundred copies for a large family gathering or for distribution, then offset printing will give you the most competitive per-unit price while retaining quality.
The Professional Route: Why Families Choose Rolling Authors
Reading through the steps, you may feel a rush of inspiration and a tinge of self-doubt at the same time. Gathering the artifacts, interviewing elders, and writing hundreds of pages of narrative is a huge project that requires at least 300 to 500 hours of work for a single book. For a busy executive, parent, or caregiver, finding the energy for this is next to impossible.
This is why families from more than 20 countries turn to Rolling Authors to create their precious legacy projects.
At Rolling Authors, we believe that great books need masters, not generalists. We are not a generic printing company, but a book development studio that has written and edited more than 400 books and 750+ manuscripts for founders, thought leaders, and families who understand that a well-crafted narrative can transform a life.
When you choose Rolling Authors for your family legacy book services, our team of professionals will help turn your treasured stories into a legacy book that will live on for generations—in your family and in your hearts.
Our master-level team will do the following:
Conduct the Interviews: Our biographers will carefully interview your elders to capture the most meaningful stories. We understand that stories are the soul of the family, so we listen gently to draw out the most life-affirming tales from your relatives.
Ghostwrite the Narrative: Our writers will craft a compelling story out of your interviews and historical facts. We will write the biography or memoir in such a way as to highlight the unique qualities that define your family.
Design and Restore: Our designers will carefully restore your photos and create a compelling layout. We will treat every page as a museum exhibit worthy of housing the precious family memories that it contains.
Manage the Heirloom Production: We will make sure that the printing house uses the right materials and techniques to preserve your book for decades to come. The result is a deluxe, museum-grade book that will become a cherished heirloom in your family for years to come.
Many of our clients choose Rolling Authors after realizing that the task of creating a family book was too big and yet delicate for them to handle on their own. They stay because we treat their legacy with the patience, care, and respect it deserves. We are here to help you invest your time and effort into something that truly matters to you and your family.
Frequently Asked Questions
1. How do I start creating a family history book?
Start by defining the scope and purpose of your book. Will it be a genealogical or a narrative history book? Do you want to feature specific ancestors or focus on family traditions? Gather materials such as photographs, documents, letters, and stories from relatives.
2. What should I include in a family history book?
Family photographs, birth and marriage certificates, letters, diaries, anecdotes, oral histories, family traditions, and relevant historical facts. Fact-checking dates and other information will help preserve accuracy.
3. How long does it take to create a family history book?
Creating a family history book can take anywhere from 3 to 12 months, depending on its scope. Researching, interviewing relatives, writing, photo restoration, and design contribute to the overall time required.
4. How should I organize the chapters of a family history book?
You may organize the book chronologically or by theme, as per your preference. A detailed table of contents will help keep the stories, photographs, and documents in order.
5. Can Rolling Authors help me create a family history book?
Rolling Authors offers a wide range of services, including family interviews, ghostwriting, research, photo restoration, book design, and heirloom production. Their team helps transform family stories and historical records into a professionally crafted book that can be passed down through generations.
Bring Your Family’s Story to Life Today
Creating a family history book is an enriching experience that allows you to appreciate your roots and preserve the stories and wisdom of past generations. You too can create a beautiful heirloom that your future generations will treasure for decades to come. Moreover, you are capable of doing it because you know how to gather the artifacts, write a compelling narrative, and design a lovely book. However, maybe there is a gap in skillset, or you just do not have the time to create the family book that you desire. The stories of your ancestors deserve to be told—no matter how demanding the circumstances may be.
Whether you decide to embark on this magnificent endeavor yourself using the guide above or outsource it to a team of professionals to ensure that it is done right—the most important thing is that you begin the process today.
Time flies fast, and your family’s stories will be waiting for you to turn the page.
Ready to transform your family’s precious memories into a stunning, professionally crafted heirloom book? [WhatsApp Us Now] to speak with a Rolling Authors legacy specialist, discuss your family’s unique story, and get a free consultation for your family history book project today!


Comments